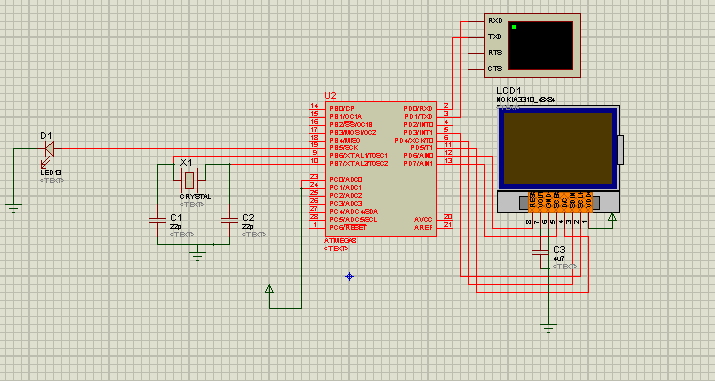
Небольшой проект вольтметра(а по совместительству измерителя стоячей волн в фидере) на основе графического дисплея из нашего магазина
сам кодCode
/*
* To use this sketch, connect the eight pins from your LCD like thus:
*
* Pin 1 -> +3.3V (rightmost, when facing the display head-on)
* Pin 2 -> Arduino digital pin 3
* Pin 3 -> Arduino digital pin 4
* Pin 4 -> Arduino digital pin 5
* Pin 5 -> Arduino digital pin 7
* Pin 6 -> Ground
* Pin 7 -> 10uF capacitor -> Ground
* Pin 8 -> Arduino digital pin 6
*
* Since these LCDs are +3.3V devices, you have to add extra components to
* connect it to the digital pins of the Arduino (not necessary if you are
* using a 3.3V variant of the Arduino, such as Sparkfun's Arduino Pro).
*/
#include <PCD8544.h>
// A custom glyph (a smiley)...
static const byte glyph[] = { B00010000, B00110100, B00110000, B00110100, B00010000 };
static PCD8544 lcd;
void setup() {
// PCD8544-compatible displays may have a different resolution...
lcd.begin(84, 48);
// Add the smiley to position "0" of the ASCII table...
lcd.createChar(0, glyph);
}
void loop() {
// Just to show the program is alive...
static int counter = 0;
// Write a piece of text on the first line...
lcd.setCursor(5, 0); // дясятое место в первой строке
lcd.print("DV-ROBOT");
// Write the counter on the second line...
lcd.setCursor(5, 2); // пятое место во второй строке
float voltage1=5.0 / 1024.0 * analogRead(0);//Измеряем U1 - падающая волна
float voltage2=5.0 / 1024.0 * analogRead(1);//Измеряем U2 - отраженная волна
float SWR=(1+voltage2/voltage1)/(1-voltage2/voltage1); //Вычисляем КСВ
lcd.print(SWR); // выводим на экран значение ксв
lcd.setCursor(49, 2); lcd.print("SWR"); //добавляем надпись "SWR"
lcd.setCursor(5, 4); // пятое место во четвертой строке
float PWR=(voltage1*voltage1)/(100); //Вычисляем мощность
lcd.print(PWR); // выводим на экран значение мощности
lcd.setCursor(49, 4); lcd.print("PWR"); //добавляем надпись "PWR"
delay(100);
}
и необходимые файлы для симуляции в Proteus